In this lesson, you will learn how to use what you learned in projects. You will also learn how to get new sprites and backdrops from the sprite and backdrop libraries.
Let’s begin with our flying parrot project. Click the little trash bin next to the cat sprite to delete it.
Note: In beginner language, characters are called sprites.
![]()
Then move your mouse over the little cat sprite with a plus sign above it. A long blue menu will pop straight upwards. Click the little search icon that says, “Choose a Sprite.”
![]()
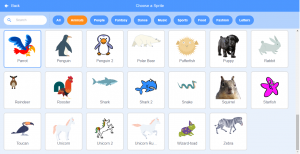
When you click it, a large sprite menu will appear. Choose a flying parrot sprite.
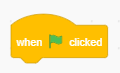
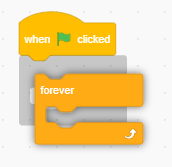
Go to the events blocks and drag a “when green flag clicked” block to the parrot sprite.
Go to the control blocks, get a “forever” block, and attach it to the “when green flag clicked” block.
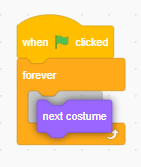
Go to the looks blocks and get a “next costume” block. Drag it inside the “forever” block.
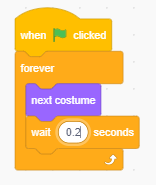
Go to the control blocks and get a “wait 1 secs” block. Drag it inside the “forever” block. Change the number 1 to 0.2.
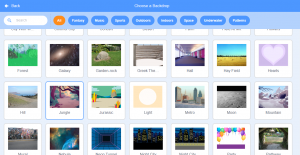
We also need a backdrop. Hover your mouse over the grassy background with a plus sign above it and you’ll find a menu stretch upwards. Select the search icon.
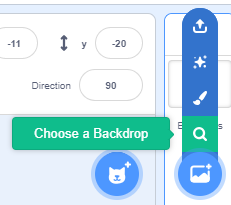
A large menu will appear. Choose a plain blue backdrop.
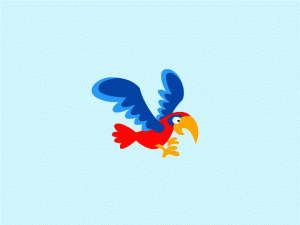
And you’re done. You will see the parrot fly. It will look like this:
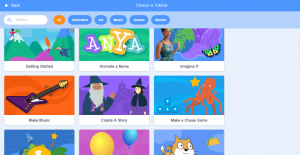
If you want more projects, you can see the tutorials. In the tutorial menu, you will find very interesting projects like games, art programs, music programs, stories, and more. You will find the light bulb next to the text saying, “Tutorials”. Click on the text of light bulb and you’ll find a large tutorial menu with many categories to choose what kind of project you want to make.